Best Replacement Battery For Galaxy Note 8
Image

Phone batteries often lose their initial power capacities with the heavy apps and games we use on our smartphones. For this reason, finding the right replacement battery can be the best solution instead of completely replacing your old phone! If you own a Samsung Galaxy Note 8, then there are several high-quality replacement batteries that will perfectly and replenish the phone’s initial battery power.
When you’ve replaced your battery, you would expect it to work just as well, if not better than the original one. Battery capacity and usage times depend on the phone’s hardware, software configurations, as well as network settings.
Best Replacement Batteries For Samsung Galaxy Note 8
SHENMZ Galaxy Note 8 Replacement Battery - 3600mAh
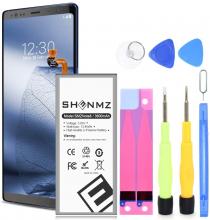
The SHENMZ Galaxy Note 8 Replacement Battery comes as a complete set with battery, tools, and instructions to help you switch out your old battery for a new one in no time. Take your phone’s power from 0% to 100% with this lithium-polymer 3600mAh battery, which is a higher capacity than the Galaxy Note 8’s original. The size and specifications of this replacement perfectly match the original for consistent performance.
A big advantage of this SHENMZ Galaxy Note 8 Replacement Battery is that it is completely safe for you and the environment since it doesn’t have any mercury, lead, cadmium, or other unsafe substances. Lithium polymer batteries are made using colloidal electrolytes that eliminate the possibility of the battery exploding under extreme pressure.
- Comes with a professional repair set with tools and instruction manual.
- CE, FCC, and ROHS certified replacement battery that ensures over 800 charge cycles.
- Built-in intelligent IC chip with a safer and improved circuit system that prevents overheating and overcharging.
Compatibility -
Samsung Galaxy Note 8 (EB-BN950ABE) -N950 -N950A ( AT&T ) -N950T ( T-Mobile ) - N950P ( Sprint ) -N920V ( Verizon ) -N950R4 ( US Cellular ) - N910H - N910F - N910C - N910W8
Package includes -
1 x Pentalobe Screwdriver
1 x Triangle Opening Pick
1 x Set of Adhesive Strips
1 x Cross Screwdriver
1 x Metal Spudger
1 x Metal Tweezer
1 x Suction Cup
1 x Ejection Pin
1 x After-Sale Card
1 x Instructions
Battery type
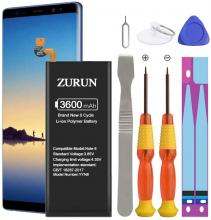
ZURUN Samsung Galaxy Note 8 Battery Replacement - 3600mAh

The ZURUN Galaxy Note 8 Battery Replacement offers full capacity and long-lasting life for your phone and restores its life back to new. Offering 3600mAh battery power, these are created keeping all safety standards in mind and come with the highest level of protection from over-charging, over-heating, over-loading, as well as short-circuiting.
We guarantee high capacity and great efficiency batteries that match the original Samsung ones. The ZURUN Galaxy Note 8 Replacement
The battery is a high-quality Lithium-polymer one, which is only sent out after full testing and going through rigorous quality standards.
- High-quality Lithium Polymer battery with 3600mAh capacity.
- Dual IC design ensures the battery doesn't fail under any circumstances.
- 2-year warranty and 3-month replacement.
Compatibility -
Samsung Galaxy Note 8 (EB-BN950ABE), SM-N950, SM-N950A (AT&T), SM-N950T (T-Mobile), SM-N950P (Sprint), SM-N950V (Verizon), SM-N950R4 (US Cellular), and SM-N950F.
Package includes -
1 x Replacement Battery for Note 8
1 x Repair Tool Kit
1 x Adhesive strip
Battery type
Wavypo Galaxy Note 8 Replacement Battery - 3600mAh
The Wavypo Galaxy Note 8 Replacement Battery is made using world-class Li-ion battery cells that provide over 700 charging cycles with high-speed and efficient charging. These batteries are thoroughly tested and only then released into the market, making them a perfectly working replacement. It features a built-in microchip that prevents any kind of heating or short-circuiting issues and is also UL, CE, and Rohs certified. Wavypo offers 12 months warranty as well as 30 days money-back guarantee.
- High-quality Grade A battery Galaxy Note 8 Battery that is UL, CE, and Rohs certified.
- A top-rated li-ion battery that provides over 700 charging cycles with high-speed and efficient charging.
- Copper connectors provide optimal internal connections.
Compatibility -
Samsung Galaxy Note 8 (EB-BN950ABE), SM-N950, SM-N950A (AT&T), SM-N950T (T-Mobile), SM-N950P (Sprint), SM-N920V (Verizon), SM-N950R4 (US Cellular), N910H, N910F, N910C, and N910W8. This battery is not compatible with Samsung GALAXY Note Edge and doesn’t have NFC or Google Wallet capabilities.
Package includes -
1 x 3600mAh replacement battery
1 x replace toolkit
1 x 12 months warranty and friendly customer service
Battery type
How to replace the Samsung Galaxy Note 8 Battery?
Things you will need -
- Nylon spudger
- SIM card ejection tool
- Fine tip curved tweezers
- Precision knife set
- Premium 2 mm red adhesive roll
- Phillips multipurpose heat gun
- Screwdriver
- Playing cards
Step 1 -
Shut down the Samsung Galaxy Note 8 phone and remove the SIM card and microSD card tray using the SIM card ejection tool, as well as the pen from the top.
Step 2 -
The phone’s display screen is solidly glued on with a tight fit on the frame. To loosen it up, apply heat to the edges and soften up the adhesive.
Step 3 -
Next, using the precision knife, make enough space to insert a playing card inside and use the card to slice through the sticky adhesive, carefully decoupling the screen from the phone’s frame. Keep in mind to not remove the display completely as it is still connected to the phone.
Step 4 -
Remove the very short fingerprint sensor cable connected to the motherboard before completely moving the screen out of the way.
Step 5 -
Using the nylon spudger, remove the fingerprint reader from the adhesive that keeps it in place on the rear panel.
Step 6 -
Remove the 16 Phillips screws you see and then pry out the mid-frame, NFC antenna, and key wireless charging coil combo. Now, you can also easily lift out the bottom loudspeaker assembly.
Step 7 -
Finally, disconnect the battery cable from the motherboard, allowing you access to remove the battery. It is wedged tightly in place and needs to be freed from the adhesive securing using the spudger.
Step 8 -
Replace the old battery for the new one and start assembling the phone back in reverse order.
{"preview_thumbnail":"/sites/default/files/styles/video_embed_wysiwyg_preview/public/video_thumbnails/f9C2GqTg_H0.jpg?itok=tXpr18ca","video_url":"https://www.youtube.com/watch?v=f9C2GqTg_H0","settings":{"responsive":1,"width":"854","height":"480","autoplay":0},"settings_summary":["Embedded Video (Responsive)."]}