Best MacBook Pro 15" Mid 2009 - Mid 2010 Replacement Battery
Image

| Battery | Check Current Price |
|---|---|
| E EGOWAY Replacement Battery for MacBook Pro 15 inch Mid 2009 and 2010 | View On Amazon |
| LQM Replacement Laptop Battery for MacBook Pro 15" Mid 2009 - Mid 2010 | View On Amazon |
MacBook laptops are known to have amazing features and long-lasting life. To elongate your battery’s life and ensure you’re utilizing it to its fullest potential, choose battery replacement as a way to do so. These MacBook battery replacement options allow you to reduce costs by not having to change your laptop time and again.
We’ve put together some of the best Best MacBook Pro 15" Mid 2009 - Mid 2010 Battery Replacement options for you to pick from.
How to know if you should replace your MacBook Pro 15" Mid 2009 - Mid 2010 battery?
One of the best features of the MacBook Pro 15" Mid 2009 - Mid 2010 is that it continually monitors the health and condition of the battery. It gives you the information needed and lets you know when it is time to repair, change, or replace it. To do so, follow these quick and simple steps without any professional help!
- Press down the Option key and then click on the Apple menu on the top left of your screen.
- Open System Information and go to Power under the Hardware section.
- You will be able to see the current cycle count and condition of your battery under Battery Information.
Top battery replacement options for MacBook Pro 15" Mid 2009 - Mid 2010
E EGOWAY Replacement Battery for MacBook Pro 15 inch Mid 2009 and 2010
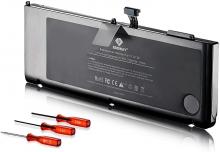
The E EGOWAY Replacement Battery for MacBook Pro 15 inch Mid 2009 and 2010 is a Li-Polymer battery with a voltage of 10.95V. It has a high capacity of 7200mAh in its Grade A cell design. It has been made to provide quick charging options with low power consumption and offers over 600 recharge cycles. The built-in circuit protection ensures safety for both the laptop and the internal battery.
Compatibility -
Apple's 15 inch MacBook Pro [A1286 Mid 2009, Early/Late 2010 versions] MC371LL/A, MC372LL/A, MC373LL/A, MC118LL/A, MB986LL/A, MB985LL/A
LQM Replacement Laptop Battery for MacBook Pro 15" Mid 2009 - Mid 2010
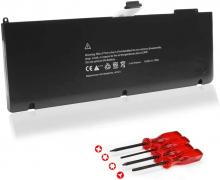
The LQM Replacement Laptop Battery for MacBook Pro 15" Mid 2009 - Mid 2010 is a brand new and high-quality one that offers premium charging options. It has a voltage of 10.95V and 73Wh. The battery also comes with built-in circuit protection that saves that battery from overcharging as well as voltage protection for better stability. The company offers 12 months warranty and 30 days money-back guarantee.
Compatibility -
MacBook Pro 15.4" inch Mid 2009 version:
- MacBook Pro 15.4" 2.53GHz Core 2 Duo (MC118LL/A, A1286, MacBookPro5,4) - Mid 2009
- MacBook Pro 15.4" 2.66GHz Core 2 Duo (MB985LL/A, A1286, MacBookPro5,3) - Mid 2009
- MacBook Pro 15.4" 2.8GHz Core 2 Duo (MB986LL/A, A1286, MacBookPro5,3) - Mid 2009
- MacBook Pro 15.4" 3.06GHz Core 2 Duo (MB986LL/A, A1286, MacBookPro5,3) - Mid 2009
MacBook Pro 15.4" inch Mid 2010 version:
- MacBook Pro 15.4" 2.4GHz Core i5 (MC371LL/A, A1286, MacBookPro6,2) - Mid 2010
- MacBook Pro 15.4" 2.53GHz Core i5 (MC372LL/A, A1286, MacBookPro6,2) - Mid 2010
- MacBook Pro 15.4" 2.66GHz Core i7 (MC373LL/A, A1286, MacBookPro6,2) - Mid 2010
- MacBook Pro 15.4" 2.8GHz Core i7 (MC373LL/A, A1286, MacBookPro6,2) - Mid 2010
How to replace the MacBook Pro 15" Mid 2009 - Mid 2010 battery?
Step 1 -
Shut the MacBook Pro and flip it over to remove 10 Phillips screws. The 3 in the upper right are longer than the others so remove those first and keep aside.
Step 2 -
Once you've removed all the screws, lift the bottom cover off. You will see 3 screws holding the battery down, which will need to be removed. The screws are hiding beneath the label so simply pull that up to reveal them.
Step 3 -
You can now lift the battery up by the tab and slide it out so it sits nearly vertical. This will give you easier access to the battery connector.
Step 4 -
Gently slide the connector from its socket and then you can lift the battery up and out of the frame.
Step 5 -
Make sure to set the outside edge of the new battery in a way that the indentations in its cover line up with the screw mounts on the frame. Move it slightly forward to insert the connector into its socket.
Step 6 -
You can now lay the new replacement battery flat into place and follow the steps in reverse order to ensure a perfect fit!
