Best MacBook Air 11" Late 2010 Replacement Battery
Image

| Battery | Check Current Price |
|---|---|
| Puredick New Battery for MacBook Air 11 | View On Amazon |
| Angwel Replacement Battery for MacBook Air 11 Inch | View On Amazon |
| Egoway New Battery for MacBook Air 11 Inch | View On Amazon |
Replace your MacBook Air 11" Late 2010 laptop battery the moment it starts discharging too quickly. This is the best way to increase the life of your laptop and ensure you don’t have to change the complete system. We’ve compiled a list of the best battery replacement options for your MacBook Air 11" Late 2010 as well as steps on how to change your battery.
When do you need to replace the MacBook Air 11" Late 2010 original battery?
The MacBook Air 11" Late 2010 monitors the health of your battery on its own and lets you know when it is time to repair, change, or replace it to ensure better usage of your laptop.
- Press the Option key and then click on the Apple menu on the top left of your screen.
- Open System Information and go to Power under the Hardware section.
- You can now see the current cycle count and condition of your battery under Battery Information.
Here are some of the best batteries for MacBook Air 11" Late 2010 Replacement
Puredick New Battery for MacBook Air 11
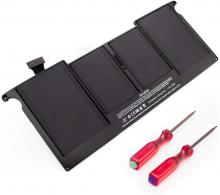
The Puredick New Battery for MacBook Air 11 is compatible with only the 2010 version and comes with 100% health, 35Wh, and 7.3V. It is a Li-Polymer replacement battery that has passed CE-/ FCC-/ RoHS certification and quality standards. It makes the perfect replacement due to the durable cells it is made up of and has a high holding capacity as well as a high cycle count for longer battery life. Extend your laptop’s life with this excellent battery that comes with a 12 Months Warranty and quick customer service.
Compatibility -
Compatible Apple MacBook Air 11" Battery Models: A1375
MacBook Air 11-inch A1370 - (Only for Late 2010)
Compatible with Part Number:
MC505,MC505LL/A,MC505LZ/A
MC506 MC506J/A MC506LLA MC507LL/A
Angwel Replacement Battery for MacBook Air 11 Inch
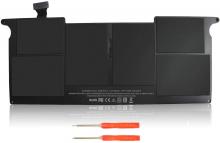
The Angwel Replacement Laptop Battery for Apple A1375 A1370 (Only for Late 2010 Version) is the perfect replacement to elongate your battery’s life. It comes with two free screwdrivers to do the replacement on your own. This is a Li-Polymer battery with a 4-cell construction and comes with a voltage of 7.3V and a capacity of 39Wh/ 5300mAh. The battery has passed CE-/ FCC-/ RoHS-certifications for complete safety features. This is a 100% new battery from the manufacturer and has up to 500 recharge cycles over the life of the battery and comes along with a 1 Year Warranty.
Compatibility -
Compatible Apple MacBook Air 11" Battery Modes:
A1375
661-5736
020-6920-A
020-6920-B
020-6920-01
Egoway New Battery for MacBook Air 11 Inch
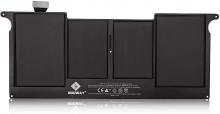
The Egoway New Laptop Battery for Mac Book Air 11 Inch A1375 A1370 is only for the late 2010 version. This is a Li-Polymer battery type with 7.3V and 39Wh/ 5300mAh. It features a 4-cell construction and also comes along with over-charging and discharging circuit protection for advanced safety. This high-performance replacement battery is also CE-/FCC-/RoHS certified with durable cells. It has a low power consumption due to its IC design and is tested under strict quality control standards by the manufacturer. Get 18 months free warranty as well as 24 x 7 customer support.
Compatibility -
MacBook Air 11" computer models:
A1370 - (Late 2010 version)
MC505
MC505LL/A
MC506LL/A
MC505LZ/A
MC506
MC506J/A
MC506LLA
MC507LL/A
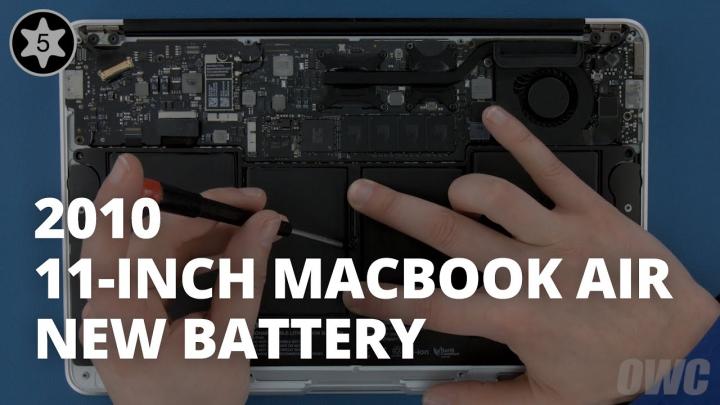
How to replace the MacBook Air 11" Late 2010 battery on your own?
Step 1 -
Shut down and unplug the MacBook Air. Make sure you are working on a soft static-free surface. Now, close your Macbook and flip it over.
Step 2 -
At the bottom, you will see ten screws to remove using a Pentalobe screwdriver. The two center screws along the hinge edge are longer than the rest so remove those first.
Step 3 -
Lift the bottom cover off but there's a snap in the center so you will have to pull a bit to detach it.
Step 4 -
You will see the battery connector that has to be carefully lifted up and removed.
Step 5 -
Next, there are five t5 screws holding the battery in its place that need to be removed. Start with the three in the back and center, and then move to the two near the front.
Step 6 -
Now all you need to do is lift the battery out of its place and replace it with the new one. Make sure it is laying flat and perfectly in place. Do the steps in reverse order to put back your laptop and start using it.